

The Fastest Way to Build a Model
The fastest way to a working model depends on what you are starting from.
Build with AI
Section titled “Build with AI”Describe the process in plain language and ProcessModel drafts the model for you. It proposes the steps, the connections, and starting times; you review the change and apply it. This is usually the fastest way from an idea to a running model.
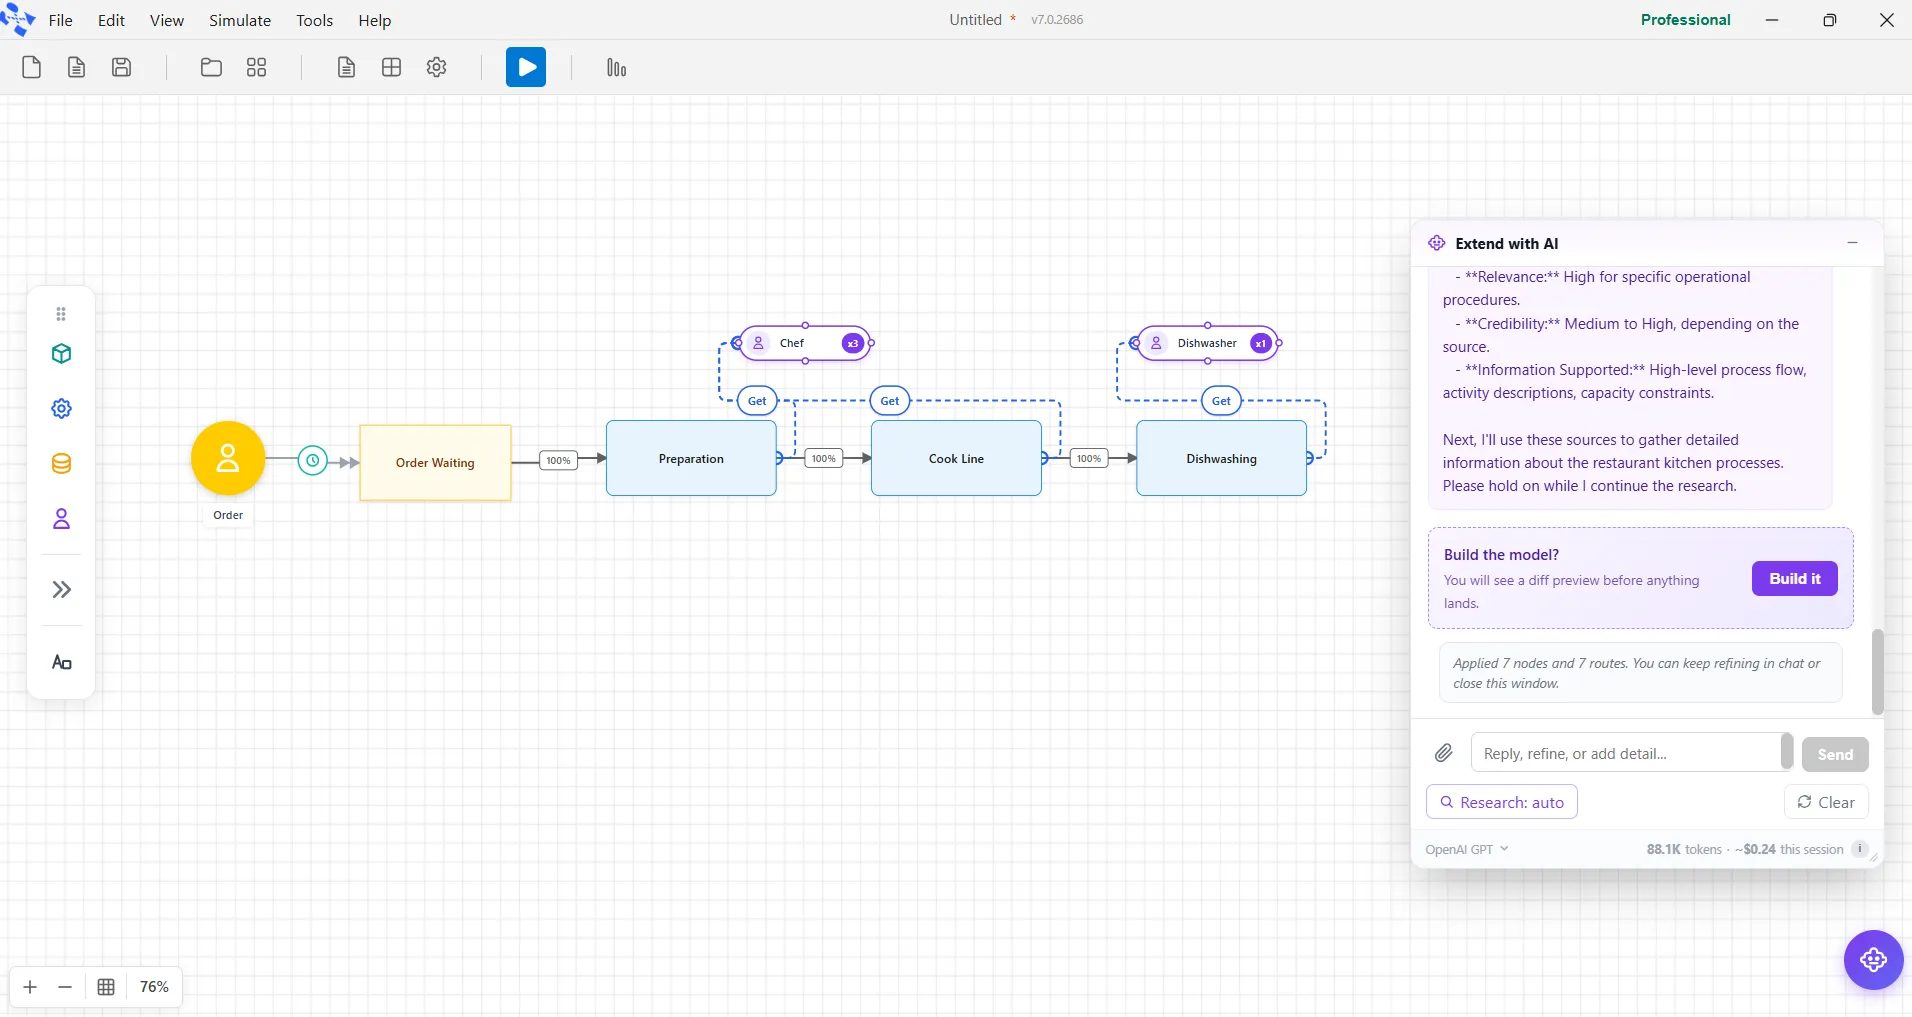
See Build with AI for the full guide, including how to edit an existing model with AI.
Start from a sample
Section titled “Start from a sample”The demo gallery has ready-made models, from a simple chain to a clinic, a production line, a call center, and a bank branch. Open one, run it, and adapt it to your process.
Draw it on the canvas
Section titled “Draw it on the canvas”Build by hand when you want full control. Drag elements from the palette, connect them with routes, then enter times, capacities, and resources. Get the flow right first, then add the detail (see best practices for model building).
Import an existing model
Section titled “Import an existing model”If you have a model from an earlier version of ProcessModel, import the workbook to bring it onto the canvas and pick up where you left off.
LegacyHow this worked in the previous version
There are two main model types. First, the traditional model uses distributions to represent most timings in the model. The conventional model can increase or decrease volumes with simple changes. If built correctly, the models are accurate and efficient. The disadvantage is traditional models take longer to create.
The second model type uses actual historical data to drive the model (Real Data Model). Model changes show the efficiency gains or losses, given the number of arrivals and defined flow. The advantages include reducing the modeling time (usually by 80%), quickly changing the arrival date range, and easy validation - known inputs provide known outcomes. The disadvantages of “real data modeling” include difficulty changing the amplitude of arrivals; it is challenging to change routing.
Method for Building a Traditional Model
Section titled “Method for Building a Traditional Model”There are many ways of building a traditional model, but reduce backtracking and rework by using the build order shown below:
Flow the process. Before spending time on the model’s behavior, ensure the flow is correct. To model the existing process accurately, walk the process with the process expert, taking notes as you go. You will uncover many critical elements by being in the work area. Pick up copies of forms or documents used in the process. Make notes as you go noting the process, timing, and resources used. Finally, go back to your computer and draw the flow diagram without entering any times, capacities, or resources.
Animate the model. Create a simple animation of the flow to verify the flow integrity. Next, create a periodic arrival that will separate the entities by enough time to allow only one entity in the process. With default times, this is usually 30 to 60 minutes between arrivals. Finally, change the time on routes to represent the approximate route length (i.e., a one-inch route would have a one-minute move time while a ten-inch route would have 10-minutes.)
Watch the model run and check the model against your notes. Make notes on the model of those things that you don’t understand, then return to the process expert and review the animated model.
Simplify and correct. Undoubtedly you will discover changes, addition, or simplifications to the model. Correct the model and perform a second review with the process expert. You will likely also obtain additional information about how the process runs during this phase. Finally, rename and save this model to preserve the Live Animation for future use. By taking the previous steps, you will save hours of work. Always get the flow correct before adding other aspects of the model. The creation of a flow-only model may seem like additional work, but you will save time creating the model in this fashion.
Timing and capacities. Enter the timing and appropriate capacities, input and output queues, and model logic. Save and run the model often to check for model errors. Save often.
Arrivals. Enter arrivals to represent the actual arrival patterns.
Resources. The last and often most challenging step is to enter the resources. Next, create the appropriate shifts, availability, and assignments to represent actual operations. Finally, verify and validate your model.
Method for Building a Real Data Model
Section titled “Method for Building a Real Data Model”There are three main steps in developing a “Real Data” model.
- Build the model to handle any order of routing.
- Build the logic to extract the routing information from entity attributes.
- Prepare the arrivals to carry attribute information.
Build the Model to Handle Any Order of Routing. Think of the model as being generic. Build it to handle any routing order. Send all entities to a common location where they will pick up the information needed to route “to” the first activity and the required processing time. When finished with the first activity, go back to the common location and pick up the information for the second location with its associated processing time.
The structure of the model has all entities entering the common location. Conditional routes read a common attribute to steer entities to the next place. Once at the activity, the processing time is another common attribute. When finished at the activity, all entities route to the common activity to pick up the following location and time.
The Model Object titled “import and overall flow” provides an example setup.
This technique is helpful in any industry. The base model might expand to hundreds of locations if needed. When changing the model to match your locations, the following will need to be modified: change the names of the activities, revise the conditions in the conditional routes, and adjust the logic described below.
Build the Logic to Extract Information from Entity Attributes. All the logic for the model is in the Director activity. The logic is simple. Every time an entity enters the Director, its counter attribute increments. If it is the first time through the Director, then the location is read from the first location attribute and the processing time from the first time attribute. If it is the second time through the Director, the location and time read from the second set of attributes. Below is an example:
INC a_Loc_CountIF a_Loc_Count = 1 THEN { a_Next_Loc = a_Loc1 a_Next_Time = a_Time1 }ELSE IF a_Loc_Count = 2 THEN { a_Next_Loc = a_Loc2 a_Next_Time = a_Time2 }ELSE IF a_Loc_Count = 3 THEN { a_Next_Loc = a_Loc3 …etc.Prepare the Arrivals to Carry Routing Information. The last step in using Real Data in the model is to structure the scheduled arrival input sheet. A complementary input sheet resides in the Arrivals Category of Model Objects. Example information populates the sheet:
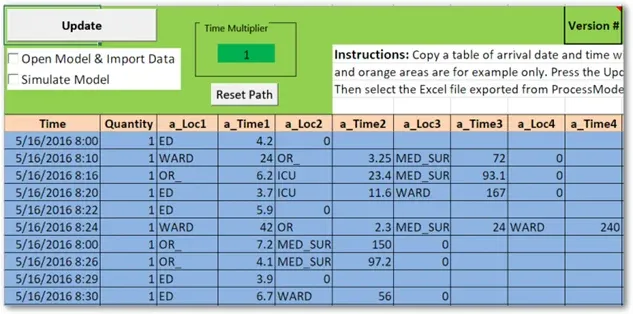
For complete information on creating a “real data model,” see Build and Test Models Faster.