
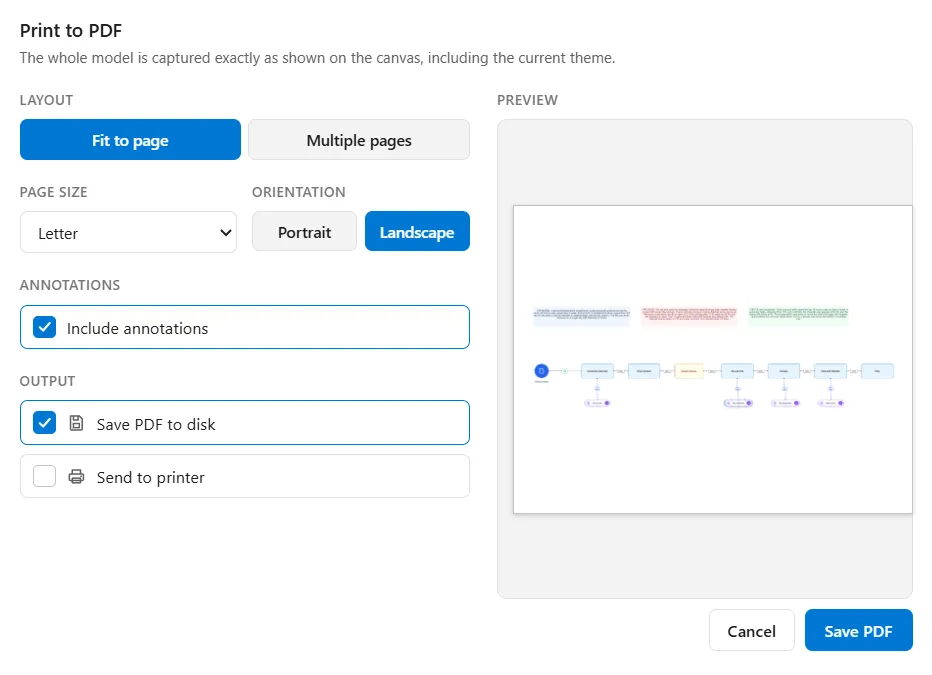
Print turns the model on the canvas into a PDF. You can save that PDF to disk, send it to a printer, or both in one step. Open it from File ▸ Print, or press Ctrl+P.
What gets printed
Section titled “What gets printed”The whole model, exactly as it looks on the canvas, including the current light or dark theme and every shape’s colors. What is printed is the model’s own extent, not the part of it you happen to be looking at, so you do not have to zoom or scroll to frame anything first. Nodes you have hidden are left out.
There is no selection-only option: printing always covers the whole model.
Layout
Section titled “Layout”Fit to page scales the whole model down until it lands on one page. This is the right choice for a review copy or an email attachment.
Multiple pages prints the model at a readable size and tiles it across as many pages as it needs, so a large model stays legible when the sheets are laid out together. When you pick it, the window tells you how many pages the model will span, and the preview draws the page boundaries so you can see where the cuts fall before you commit.
Page size and orientation
Section titled “Page size and orientation”Five page sizes are available: Letter, A4, Legal, Tabloid and A3. Orientation is Portrait or Landscape, and Landscape is the starting choice, since most models are wider than they are tall.
Changing the layout, the page size or the orientation updates the preview immediately, and the preview uses the same page arithmetic the finished PDF uses, so what you see is what you get.
Annotations
Section titled “Annotations”Include annotations controls whether the labels, images and shapes you have added on the annotation layer appear in the output. It is on by default. Turning it off removes them from the printed page and from the area that gets printed, so a model with notes scattered around its edges prints tighter without them.
If the model has no annotations, the option reads Include annotations (none in this model) and cannot be selected.
Output
Section titled “Output”Two independent choices:
- Save PDF to disk asks you where to put the file. It is offered first, with the model’s name filled in as the file name.
- Send to printer hands the PDF to your computer’s own print window, where you pick the printer and its settings as usual.
You can select both. The button at the foot of the window changes to match what you have chosen: Save PDF, Print, or Save and print. At least one output has to be selected before the button will do anything.
Related
Section titled “Related”- Auto-Layout tidies the model before you print it.
- Routing settings control how connectors are drawn, which is what the printed page shows.