

ProcessModel 7 Self Teach GuideChapter 14
Chapter 14. Let Your Own AI Build the Next Shop
By the end of this chapter you can
Start faster, from a demo model or with your own AI.

Before you start
For thirteen chapters you built one shop by hand, a shape at a time. That was the point: you now know what every shape, line and setting does, and you can read a report and judge a fix. Building by hand is how you learn. It is not always the fastest way to start.
This chapter shows the faster starts, from the one you already know to the newest:
- A demo model: a finished model of a real problem. Open the one closest to your process and change it.
- Your own AI, through PM AI Bridge: describe a process in plain words and let your AI build it, run it and read the results, while you watch and can take over at any time.
- An industry palette and Import, for two more special starts.
None of these replaces what you learned. They save you the typing, and what you learned is how you check the result.
You need about twenty minutes. For the AI part you need PM AI Bridge, which is included with Professional (the 14-day free trial includes the full app, with PM AI Bridge available to turn on), and an AI app installed on your computer, such as Claude, ChatGPT (Codex), Cursor, Google Antigravity or Grok Build, with your own account for it. Your phone repair shop is not needed: this chapter starts something new.
Step 1. Start from a demo model
You opened a demo in Chapter 1 to learn the window. Now open one as a starting point.
- Close the Welcome screen, then click Demo Models on the toolbar.
- Click Services, and scroll down to The Pile Behind the Counter.
- Click Read the brief: the story behind the model, the problem it answers and how it is built.
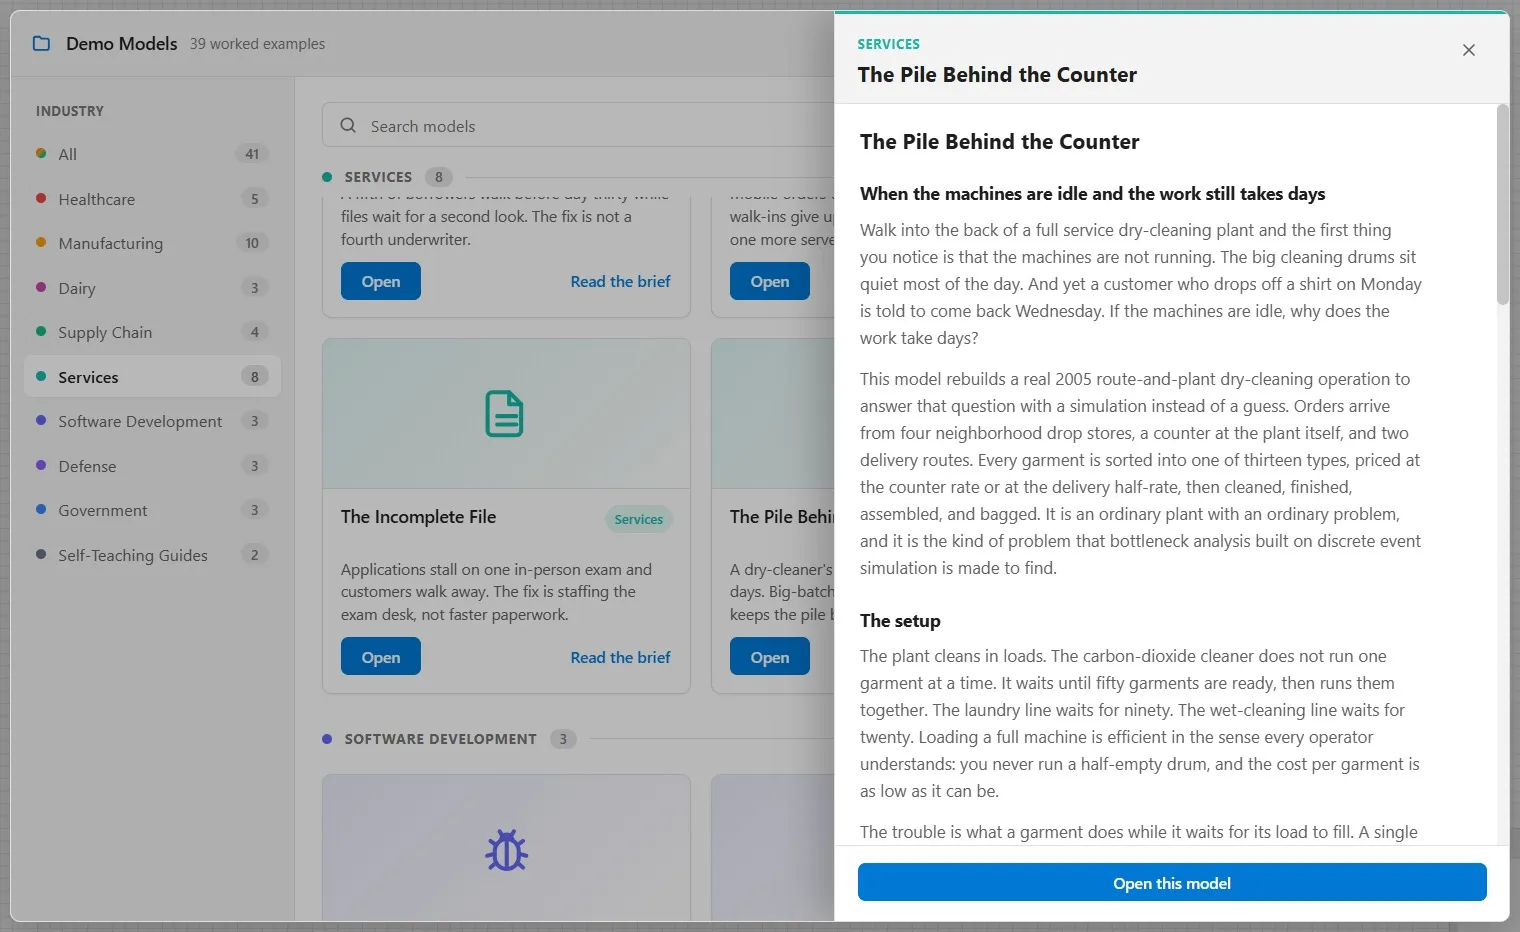
- Click Open this model. Run it, change it, make it your own: the original never changes.
When to start from a demo: when one is close to your process. Changing the numbers and names of a working model is far faster than drawing one, and the demo already shows good practice. To get back to the Welcome screen, click Open Model on the toolbar.
Step 2. Turn on PM AI Bridge
PM AI Bridge lets your own AI app on this computer work in ProcessModel: read your model, change it, run it and read the results. ProcessModel does not provide the AI: you bring the AI app and its account. An AI you only use in a web browser cannot reach ProcessModel.
- On the Welcome screen, click Settings.
- Under AI Integration, find the PM AI Bridge card, “Let your own AI on this computer control ProcessModel”, and turn its switch on.
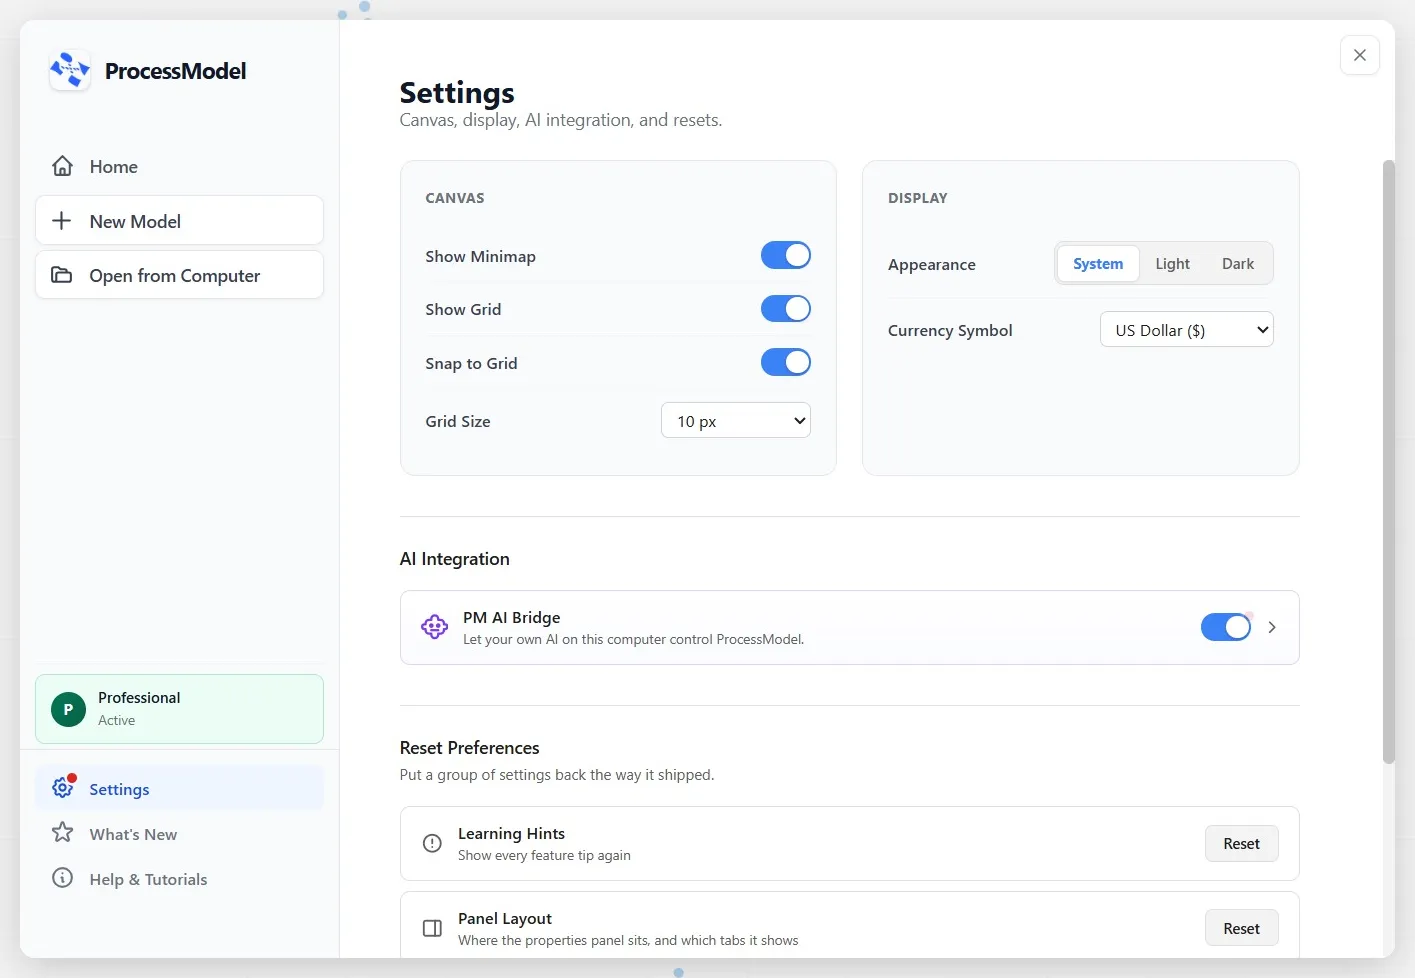
The first time, your AI app needs to be connected to ProcessModel: open the card and use Set up your AI. The PM AI Bridge help walks you through it.
Step 3. Describe the shop in plain words
- Click New Model. An empty canvas opens.
- In your AI app, describe what you want, as you would to a colleague. In the video, the request was:
Build a model of a small phone repair kiosk at the mall. Customers walk in about every 12 minutes from 10 AM to 8 PM. One technician checks each phone in, in 2 to 4 minutes. Seven in ten are fixed on the spot in 5 to 10 minutes; send the rest to a step called Main Shop. Run the day ten times and tell me how long customers wait.
Read that request again with what you now know. It names the entity, each step and its time as a range, a percentage split, a resource, an arrival window, and ten replications. It is exactly the information you typed by hand in Chapters 2 to 10. The clearer your words, the closer the first model. Your knowledge is what makes the request good.
Step 4. Watch your AI build it
Your AI adds the steps, connects them and sets the times, and you watch it happen.
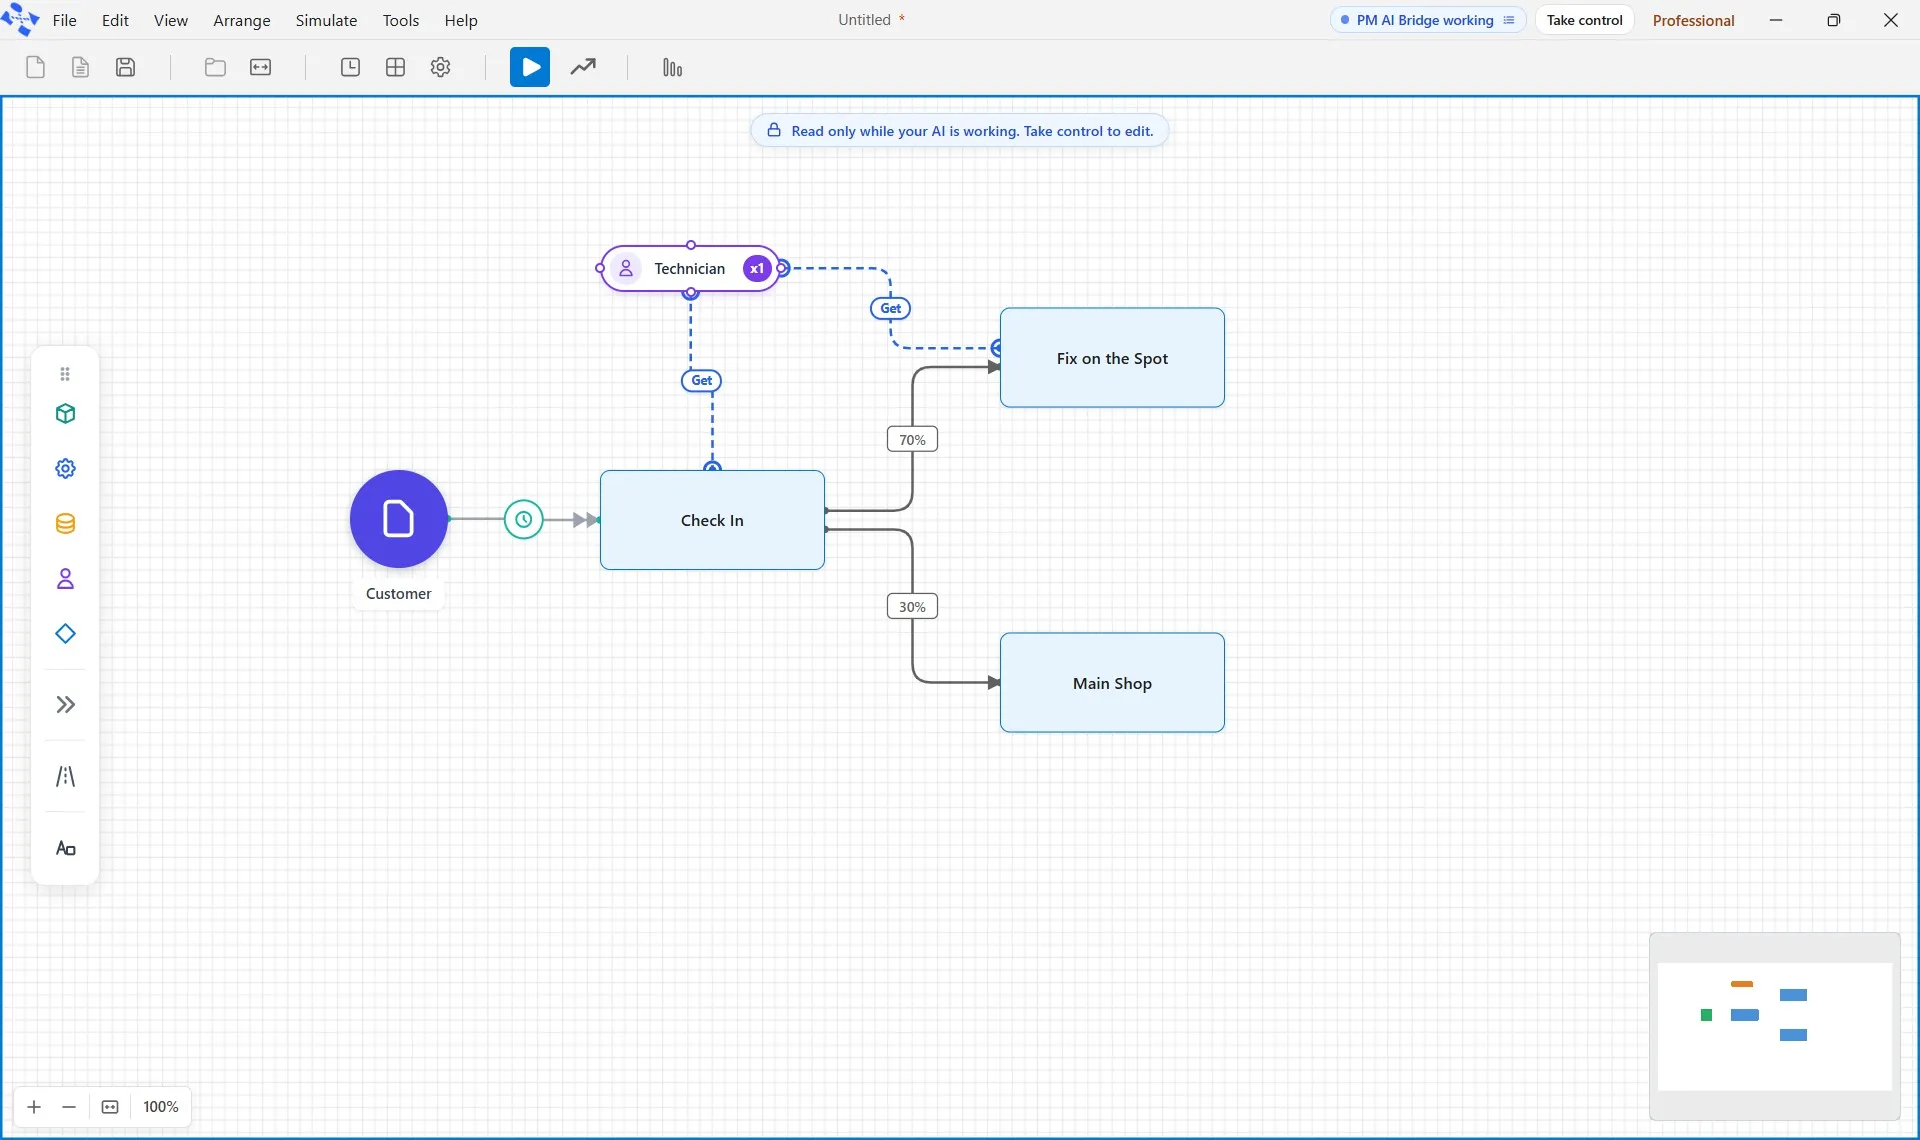
What you should see:
- Each new shape is marked Just added as it appears.
- While your AI works, the canvas is read only, with a blue edge and the note “Read only while your AI is working. Take control to edit.”
- The title bar shows PM AI Bridge working and a Take control button. Press it at any moment and the model comes back to you.
Then your AI checks its own work, runs the day ten times, and opens the report. In the video its answer was that customers wait about 6 minutes to be checked in.
Step 5. See exactly what your AI did
You are responsible for any model you present, whoever built it. So check it.
- Click the PM AI Bridge label in the title bar while your AI is working: it shows only then, as Take control does. A panel shows what your AI just did, and what it did before that. If your AI has finished, ask it to check the model, and click the label while it does.
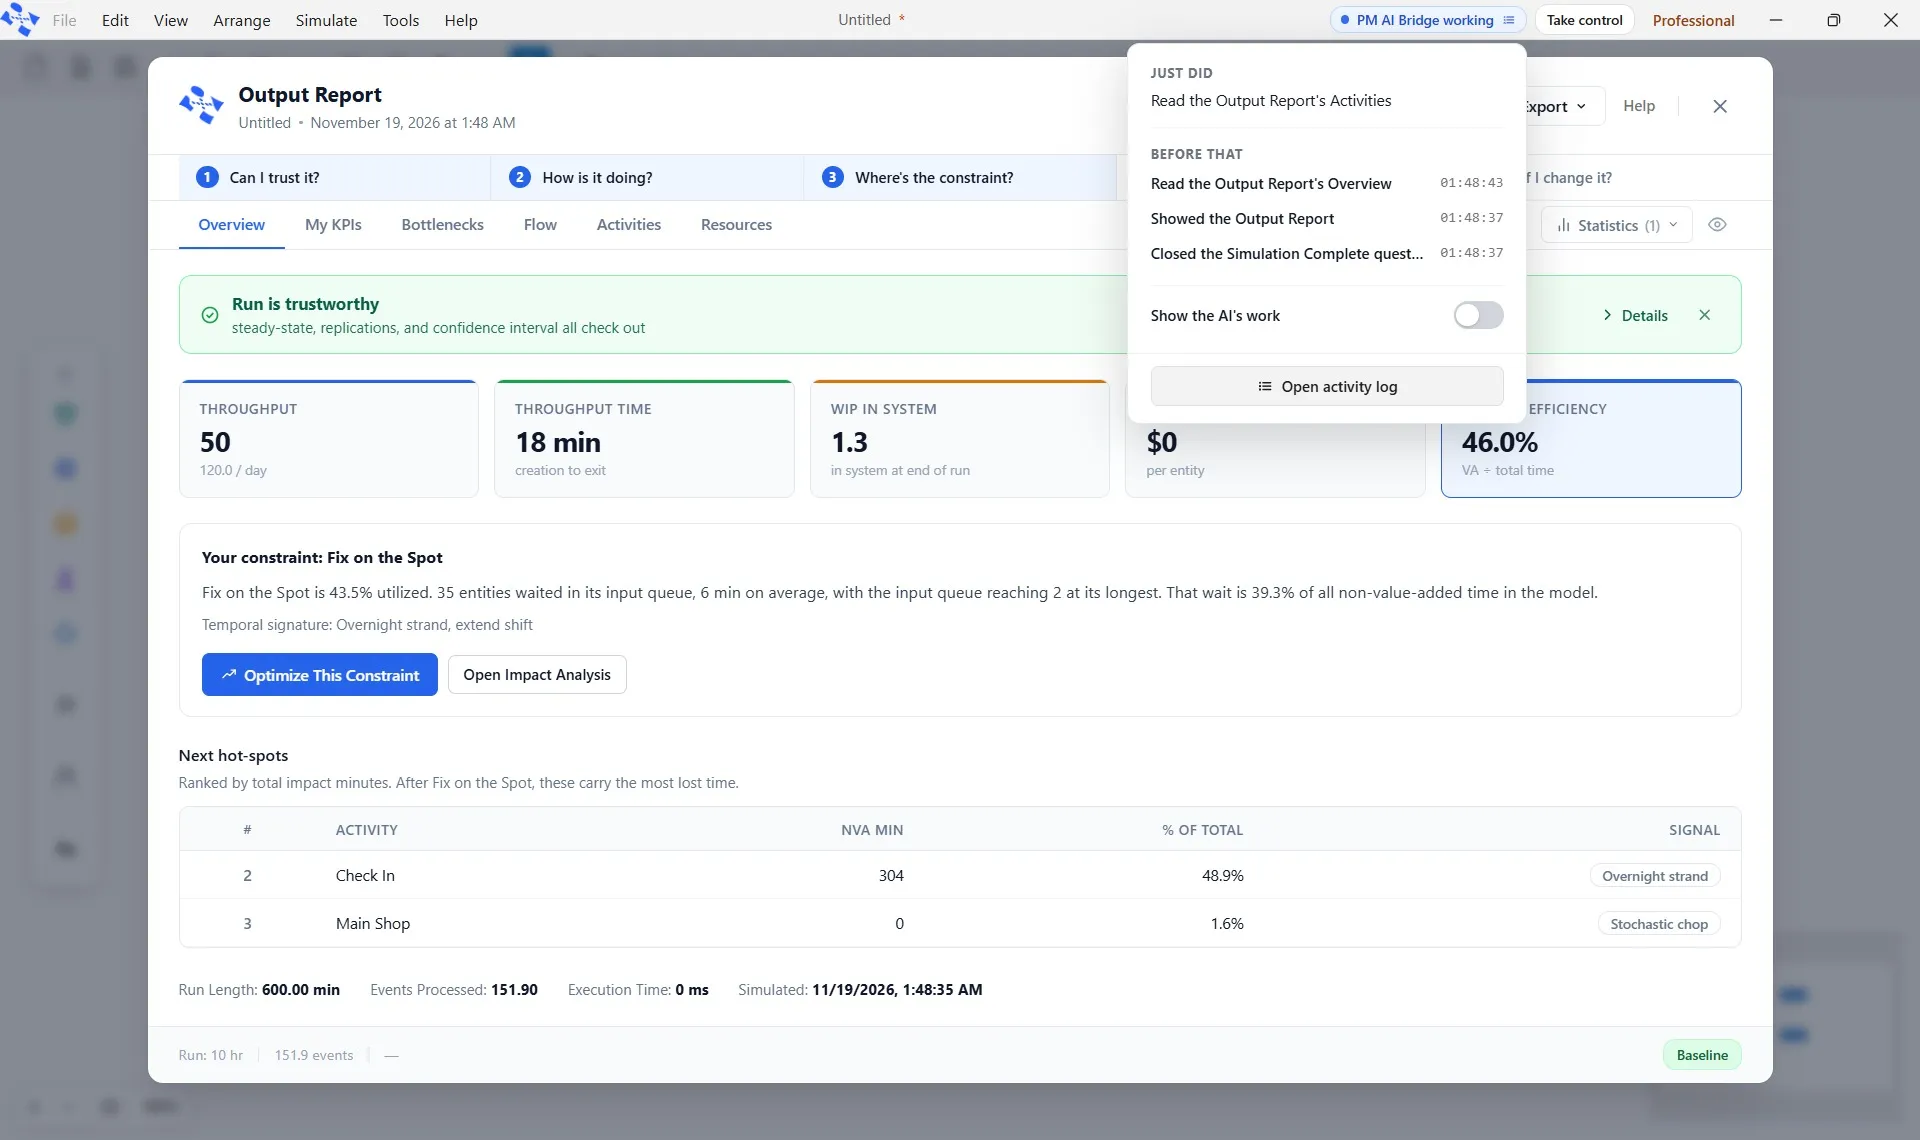
- Click Open activity log.
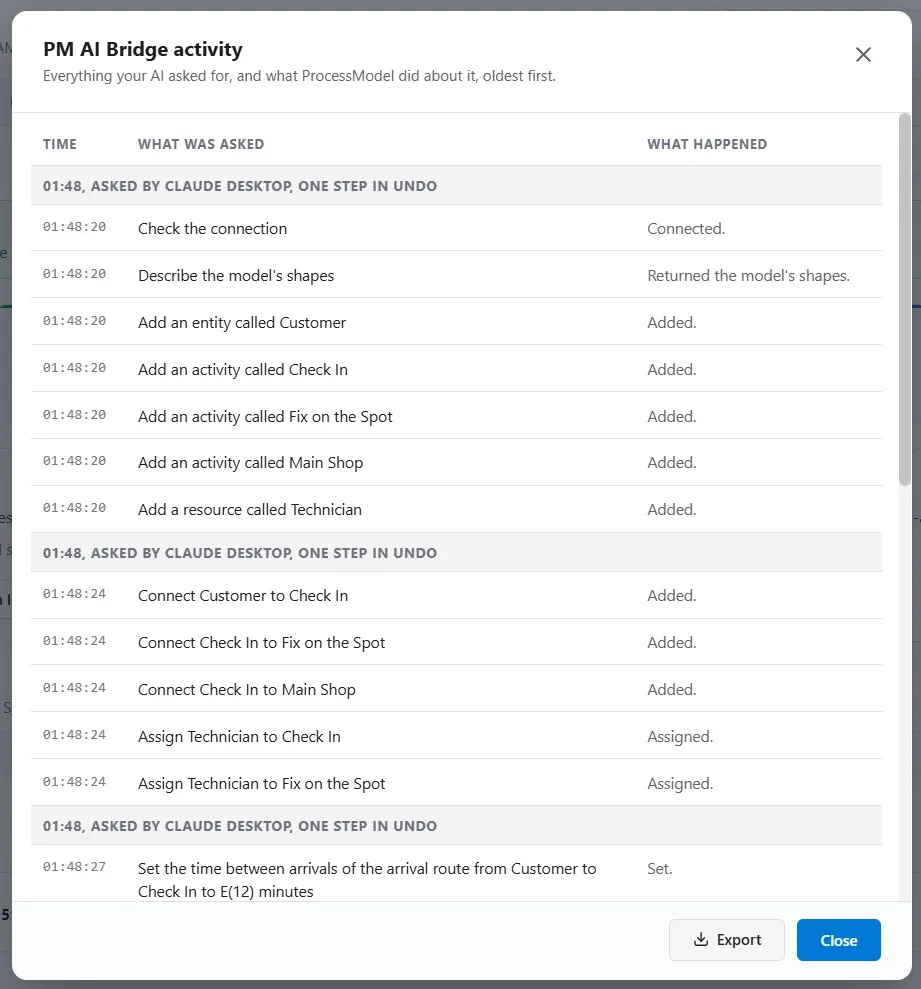
Everything your AI asked for is here, with what ProcessModel did about it, oldest first. Each stretch of work is one step in Undo, so you can take back a whole stretch at once.
- Click Close, then close the report.
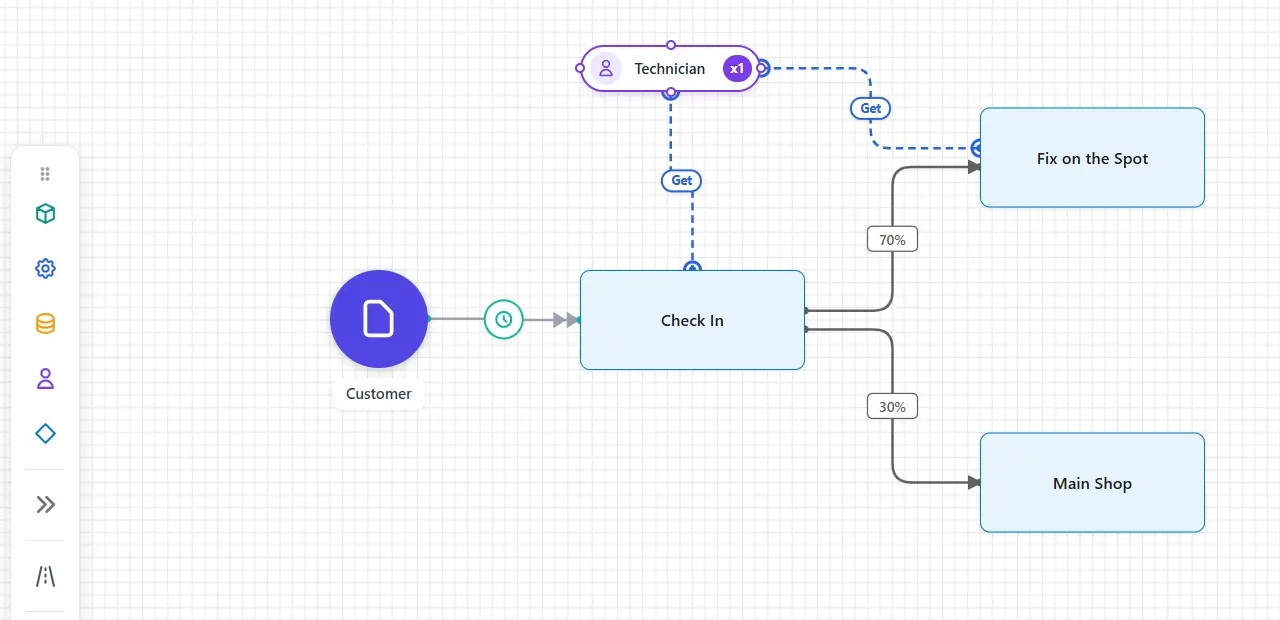
Check it with your own eyes. The entity, the steps, the 70 and 30, the Technician on Check In and Fix on the Spot: everything is a shape and a setting you know how to open and read. Double-click a few and check the times against your request.
Step 6. Save it
- Click File, then Save As.
- Type the name Phone Repair Kiosk, pick a folder, and click Save Model.
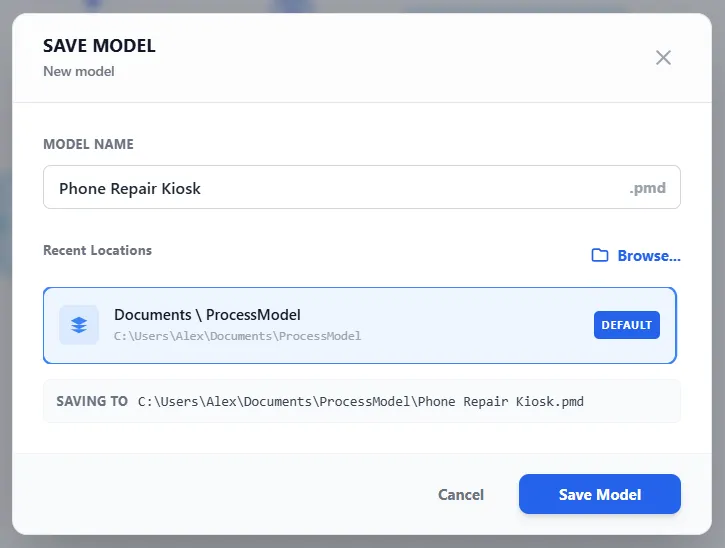
It is saved like any model, and it is yours.
Step 7. Two more faster starts
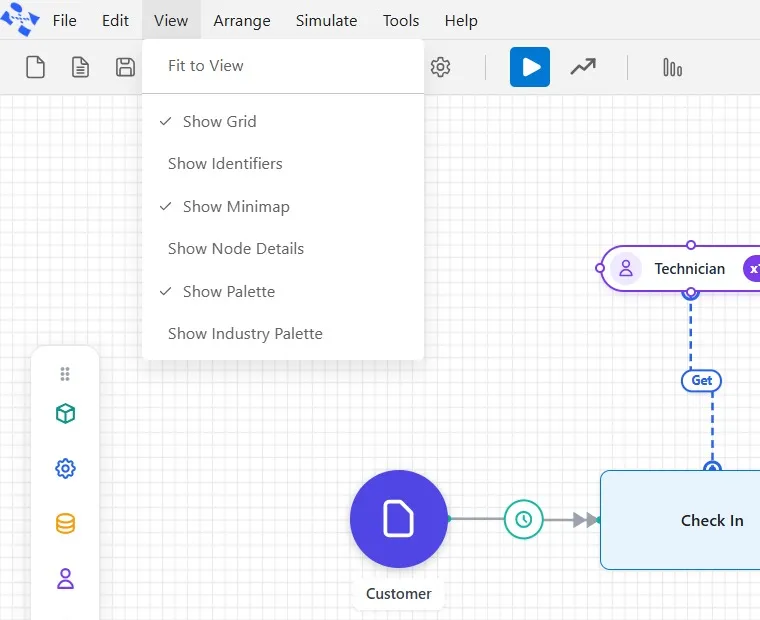
An industry palette. Click View, then Show Industry Palette. It docks a panel on the right that gathers the elements for one industry: Process plant, Software delivery or Healthcare, so a model in that field starts from its own vocabulary. See Industry palettes.
Import. Click File, then Import, to bring in a model made in the earlier version of ProcessModel. See Import legacy models.
Your practice model
- Start fromA new modelNew Model on the Welcome screen: your AI builds the shop on it.
- Compare withChapter 14. Let Your Own AI Build the Next ShopThe phone repair kiosk the AI built in the video. Open it to compare with what your own AI builds.
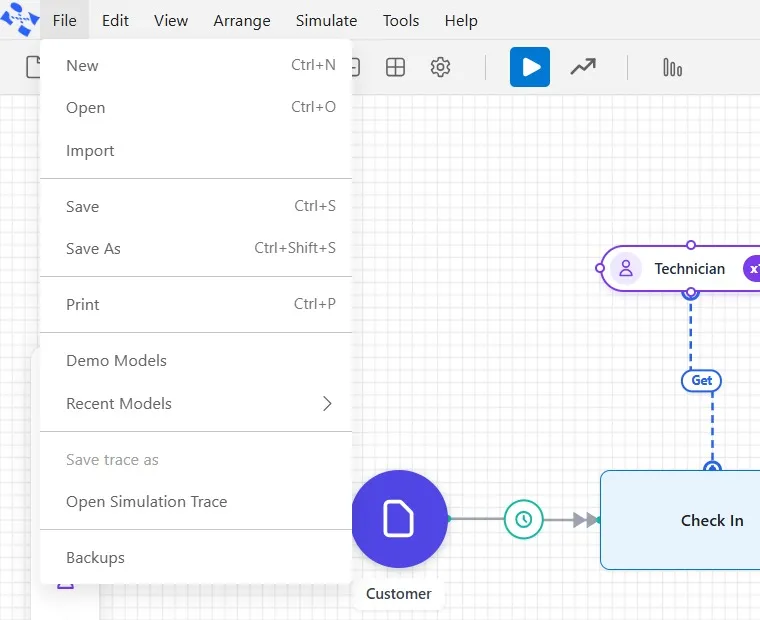
The model to compare with is in File ▸ Demo Models, in the Self Teach Guide group. A demo model opens as a new model, so the original never changes.
Check yourself
Try it yourself
Give your own AI a request of your own, then check its work.
- With PM AI Bridge on and a new model open, ask your AI to build the Chapter 2 shop: customers every 10 minutes, Check In 3 minutes, Repair 12 minutes with one Technician, Pick Up 2 minutes, run for 8 hours once.
- While it works, click the PM AI Bridge label and Open activity log, as in Step 5. When it is done, double-click Repair and the Technician to check their settings.
Mark it done
When you know three faster ways to start a model and how to check what your AI built, turn on Done.
You watched this chapter's video.Not watched yet: the video is marked when it plays to the end.
Kept in this browser only, and shown on the course page.